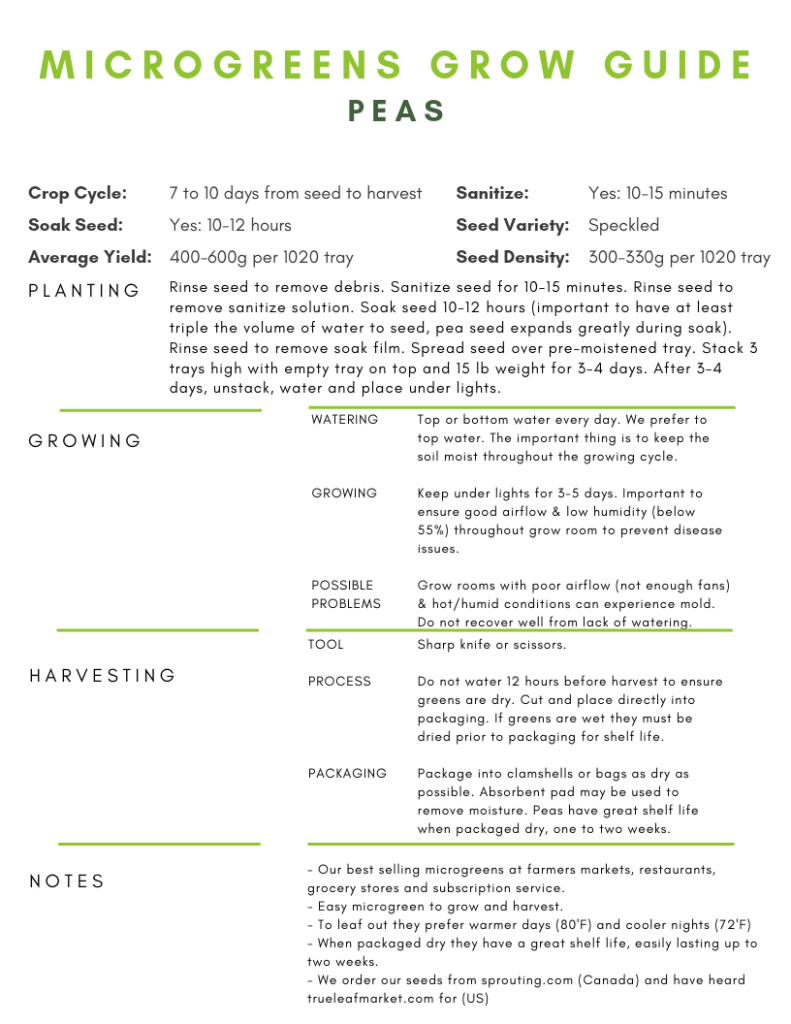
We’ll show you all the steps to go from seed to sale to grow perfect pea shoot microgreens regardless if you’re new to growing microgreens or an experienced growing looking to improve your pea shoots yield per 1020 tray. We got you covered.

Make sure you download the FREE PDF grow-guide to grow perfect pea shoot microgreens at the bottom of the page!
Here’s what we’re going to cover:
- What equipment is needed to grow pea shoot microgreens?
- Where to order seeds?
- How to store your microgreens seed.
- How to soak & sanitize your pea microgreens seed?
- How to plant & germinate pea microgreens.
- How to water & grow pea microgreens.
- How & when to harvest pea microgreens.
- What do you do with the soil after harvesting pea microgreens?
- How to package your microgreens.
- How to sell pea microgreens.
- Pea microgreen recipes – How do you eat them?
- Pea microgreens nutritional data.
- Pea microgreens health benefits.
- Free PDF Grow Guide for growing perfect pea shoot microgreens.
What equipment is needed to grow pea shoot microgreens?
Here is a list of the equipment we personally use to grow our pea microgreens.
Note that we use Amazon affiliate links to point to any Amazon products mentioned in the list below if you purchase we receive a small commission – so many thanks if you use them.
- Shallow trays with holes
- Shallow trays without holes
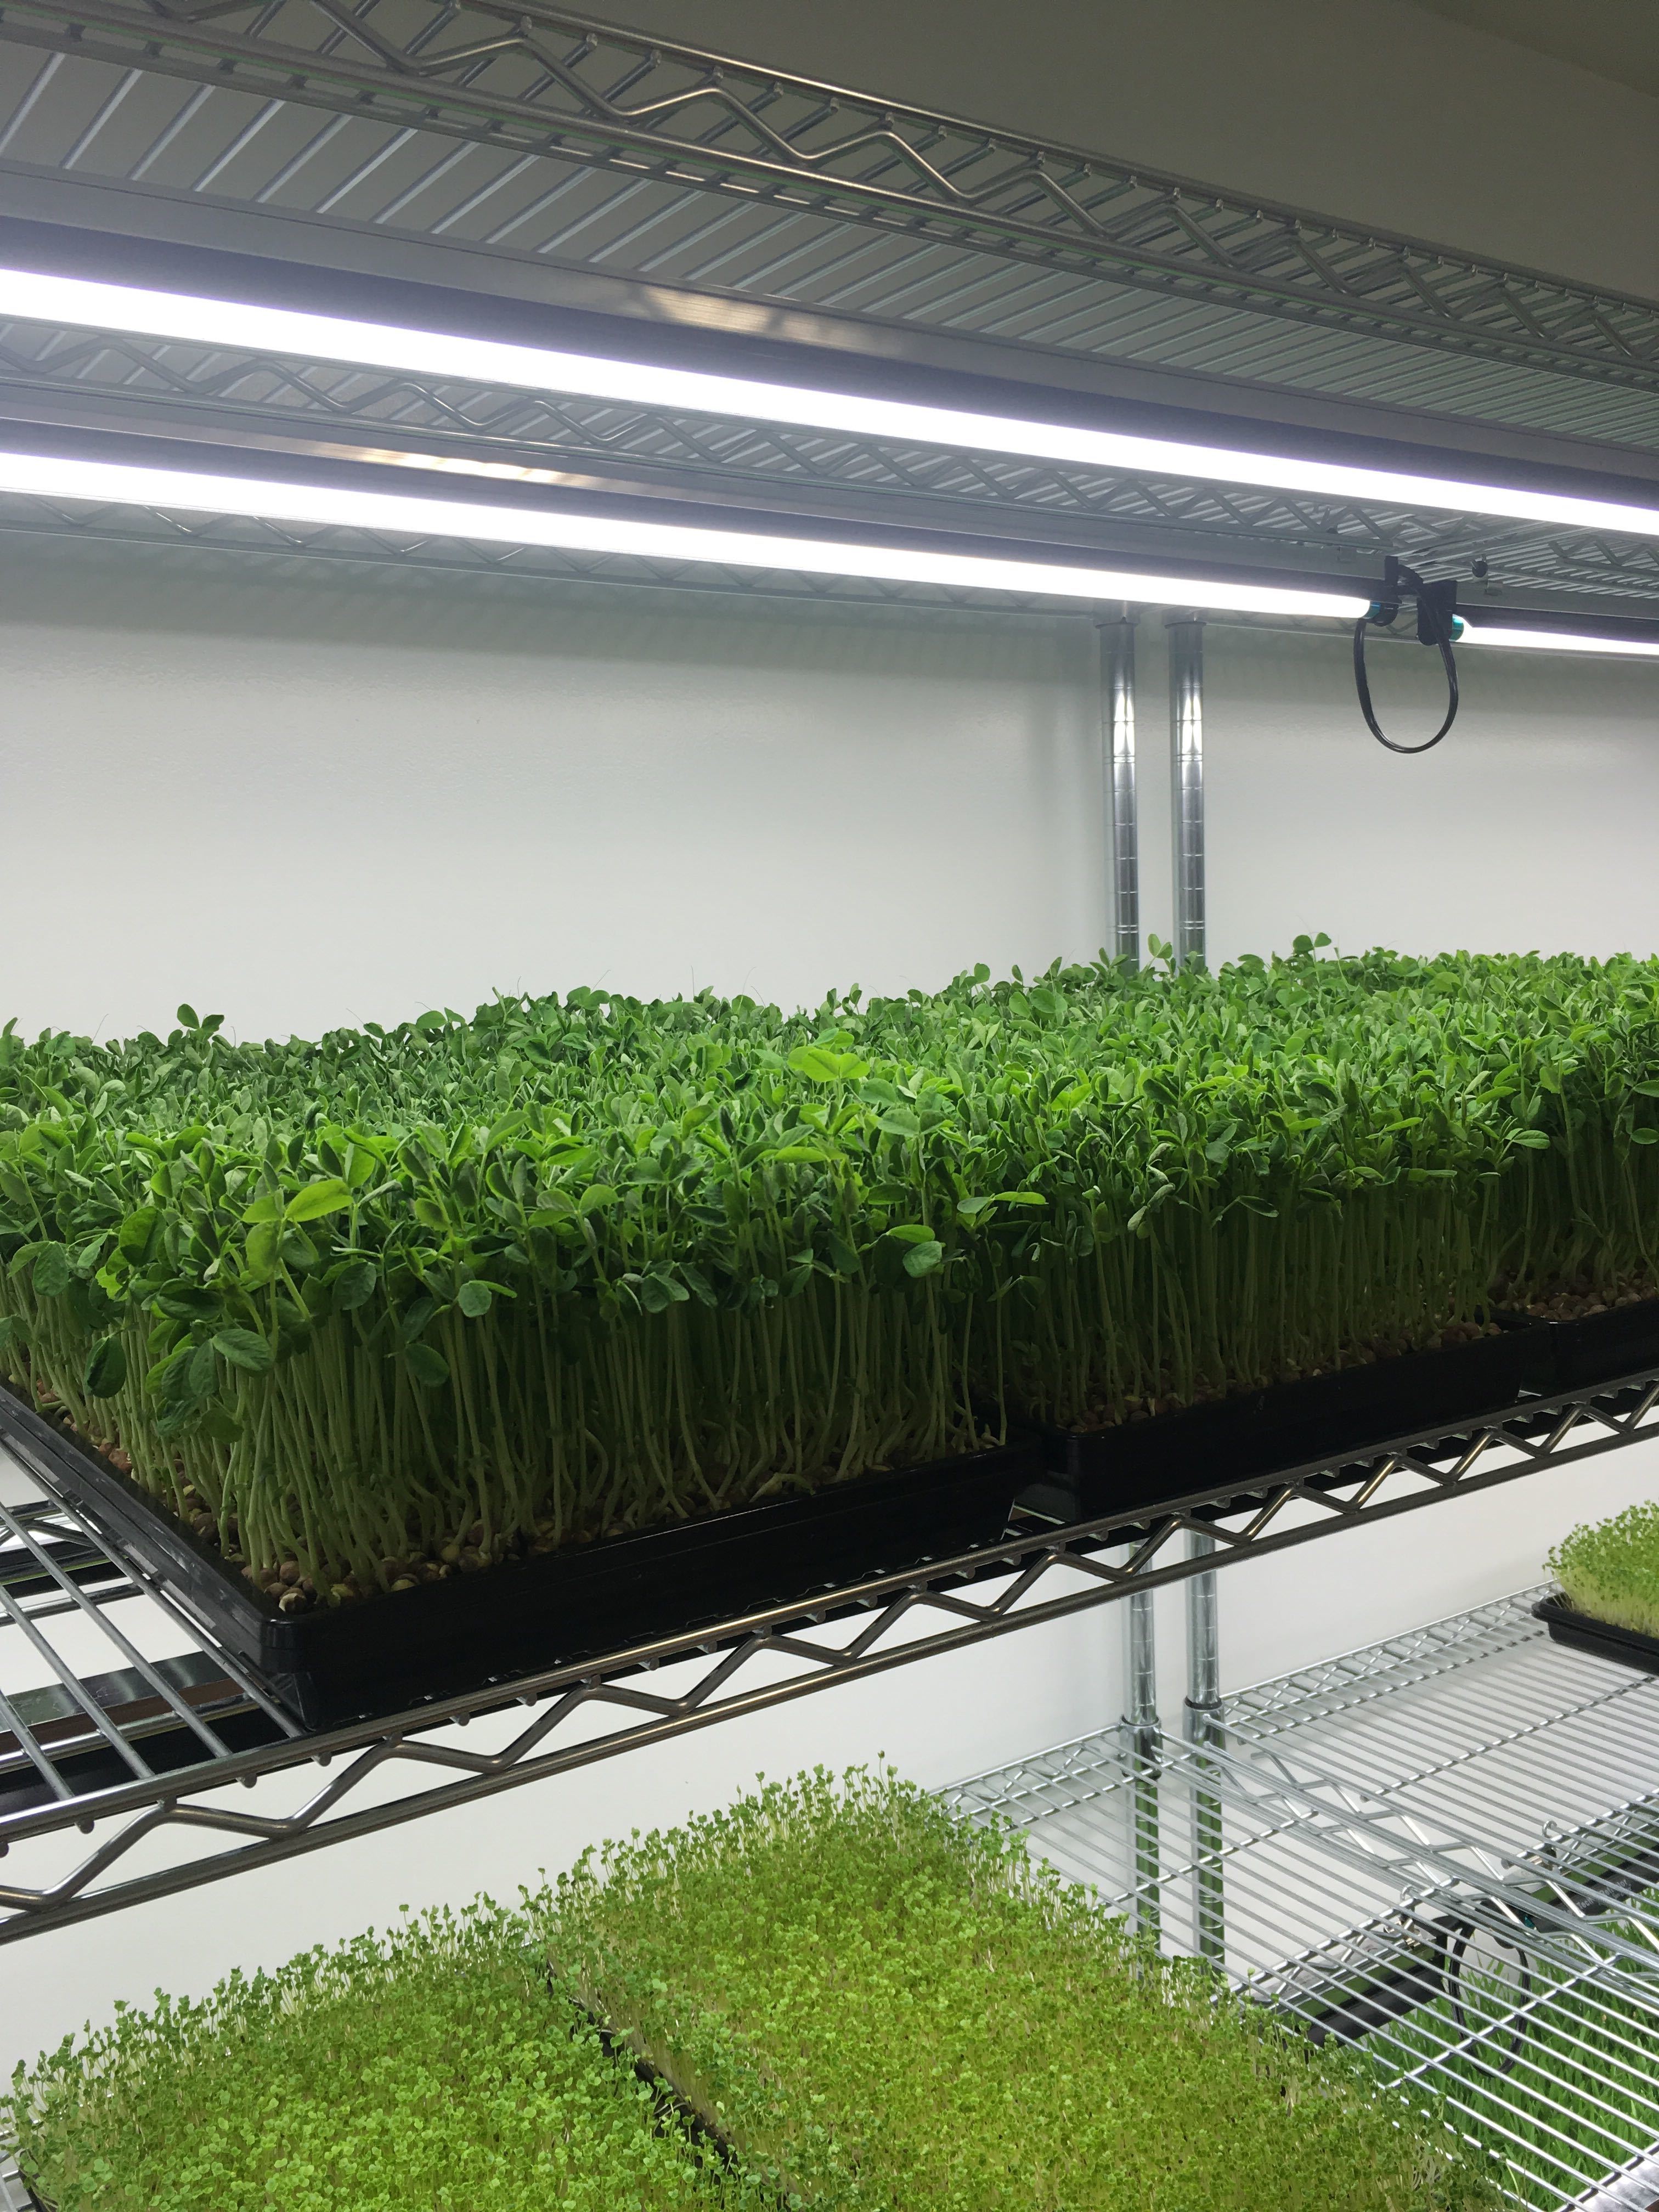
- Commercial shelving unit – Size 72″H x 48″W x 24″D
- Grow lights – Highly recommend these as I’ve had great success with them and still use them today!
- 1″ S Hooks – If you buy the grow lights recommended above you’ll need these S hooks to install them on the metal shelving.
- 6 ft work table – What we do all of our soil work, watering, & harvesting on.
- Soil – Promix premium all-purpose mix
- 5-gallon buckets – We use these buckets for sanitizing & soaking our pea microgreens seeds. Usually cheaper if you buy them at your local hardware store.
- Seed sanitizer – I started with 3% Food Grade Hydrogen Peroxide & switched to 12% concentration bleach to sanitize our pea seed prior to planting. Unscented bleach of 5.25%, 8.25% or 12% concentrated works. It can usually be purchased any local hardware or grocery store.
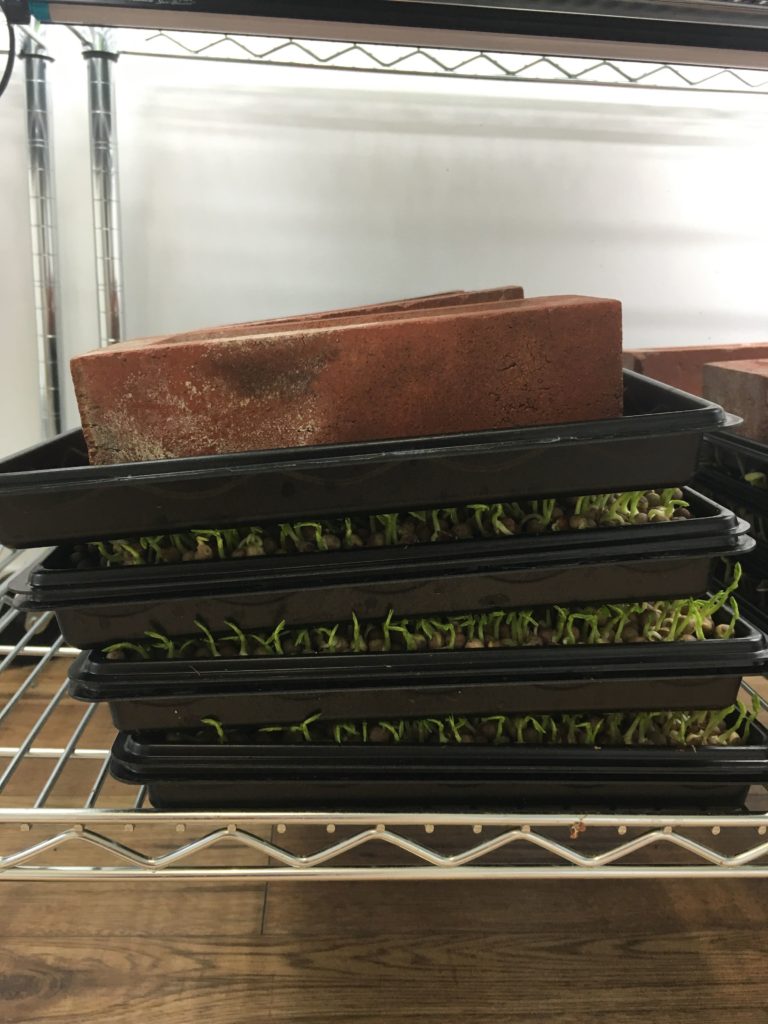
- Bricks – Used to weigh down trays during germination. We have three 5 lb bricks per tray. They can be purchased at your local hardware store or concrete facility.
- Fans – It’s important to get enough airflow throughout your grow area and above your crops to prevent disease. Our grow room is 138 sq ft and there are 7 fans.
- Light timer – Used to control the length of time your grow lights are on.
- Power surge protector 8 outlets – If you’re short on electrical outlets, this is required.
- Watering jugs – Used to bottom or topwater your pea shoot microgreens.
- Digital Scale – Used to weigh your harvested pea microgreens prior to packaging them.
- Knife – Used to harvest your microgreens, I started with a sharp kitchen knife. If you’re looking to purchase one here is my recommendation.
- Packaging – If your looking for our clamshells in the picture below these are the clamshells I recommend as they’re plant-based which has been great for our marketing.
- Seed Scoop – Free we use an old 250ml measuring cup and some old spoons to spread our pea seed.
- Seed Storage – We use Rubbermaid containers to store our dry pea seeds.
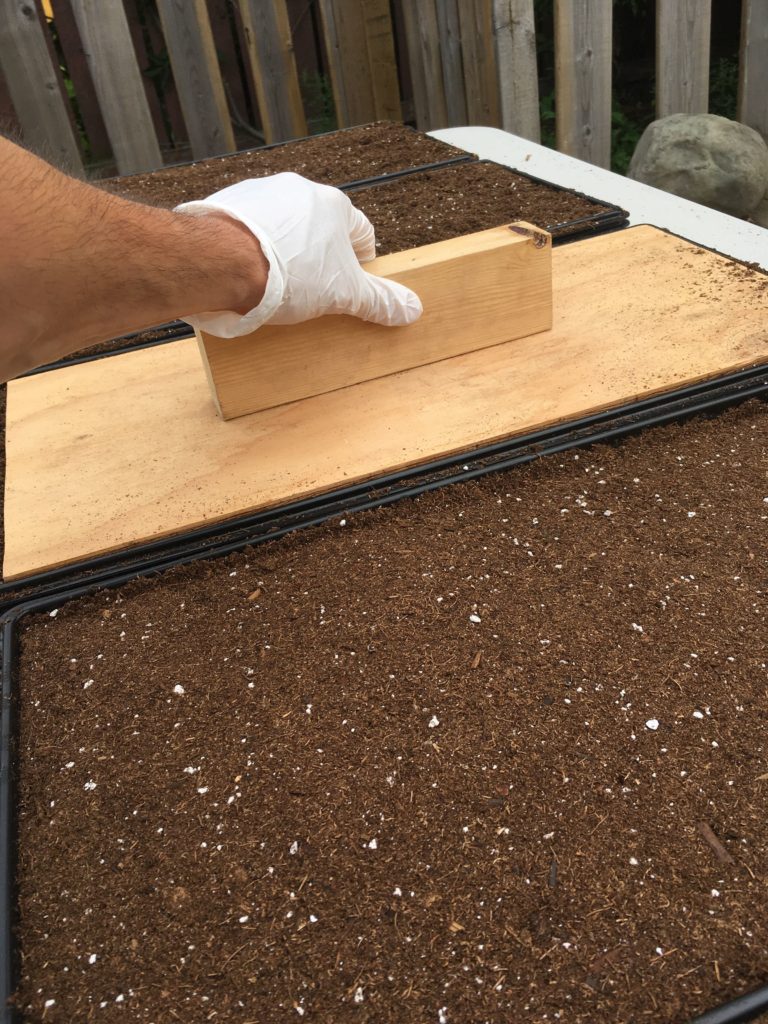
- Soil Tamper – Free & homemade. You’ll definitely want to make one of these as it creates a nice compressed, level soil bed to plant your seeds on.
Where to order seeds?
Our microgreen operation is located in Canada and my favorite source to purchase our speckled pea seed is from Mumm’s Sprouting Seeds.
Organic Pea Shoot Microgreen Seed Suppliers:
If you purchase your seed from another supplier and have been happy with the results let me know in the comment section below and I’ll add it to the list.
How to store your microgreens seed
Ideally, you should store your pea seeds in a cool dry place. The pea seed we’re going to use within the next coming weeks/month is stored in a Rubbermaid container in the closet. The seed we’re not readily going to use we store them in the fridge or freezer to extend the germination life of the seeds.
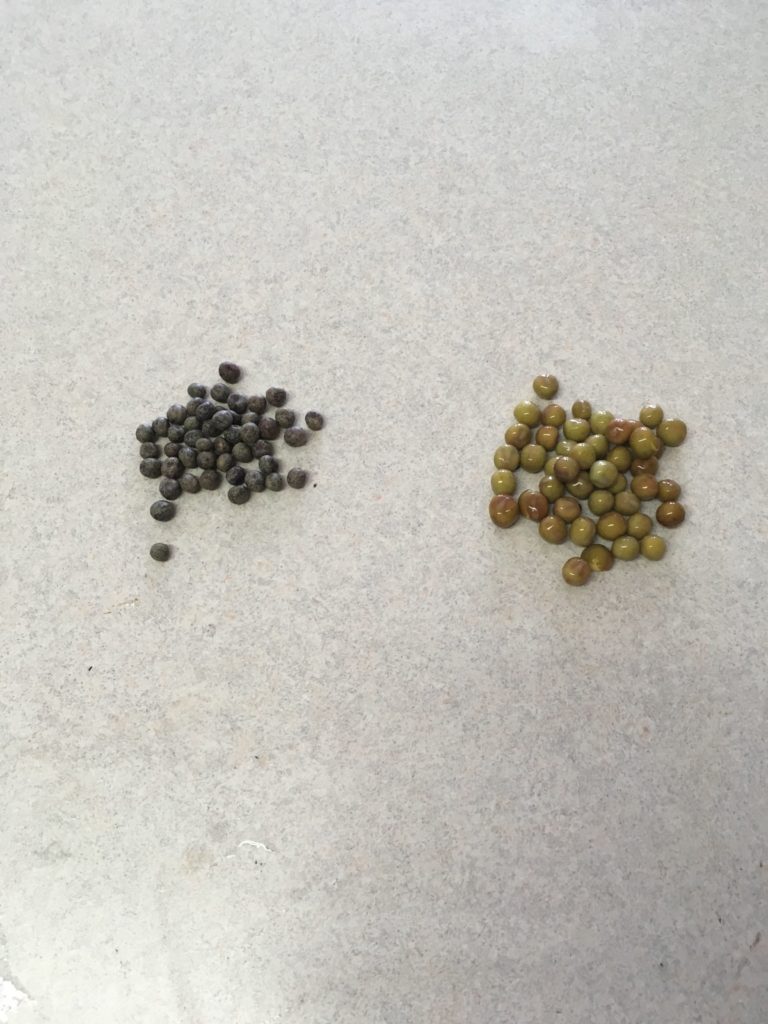
How to soak & sanitize your pea microgreens seed?
We follow a 5 step process to soak and sanitize our pea seeds.
- Step #1: Initial rinse – removes any debris from the seed and makes the sanitizer solution more effective.
- Step #2: Soak the seed in our sanitizer solution for 15 to 20 minutes – effectively sterilizes and kills any pathogens present on the seed source.
- Step #3: Rinse – removes the sanitizer solution from the seed.
- Step #4: Soak – soak seed in warm water for 10 to 12 hours. When performing your soak you should have at least three times the volume of water to seed, as the pea seed expands and absorbs a large amount of water during the soak.
- Step #5: Final rinse – remove the soak residue from the seed and prepare for planting.
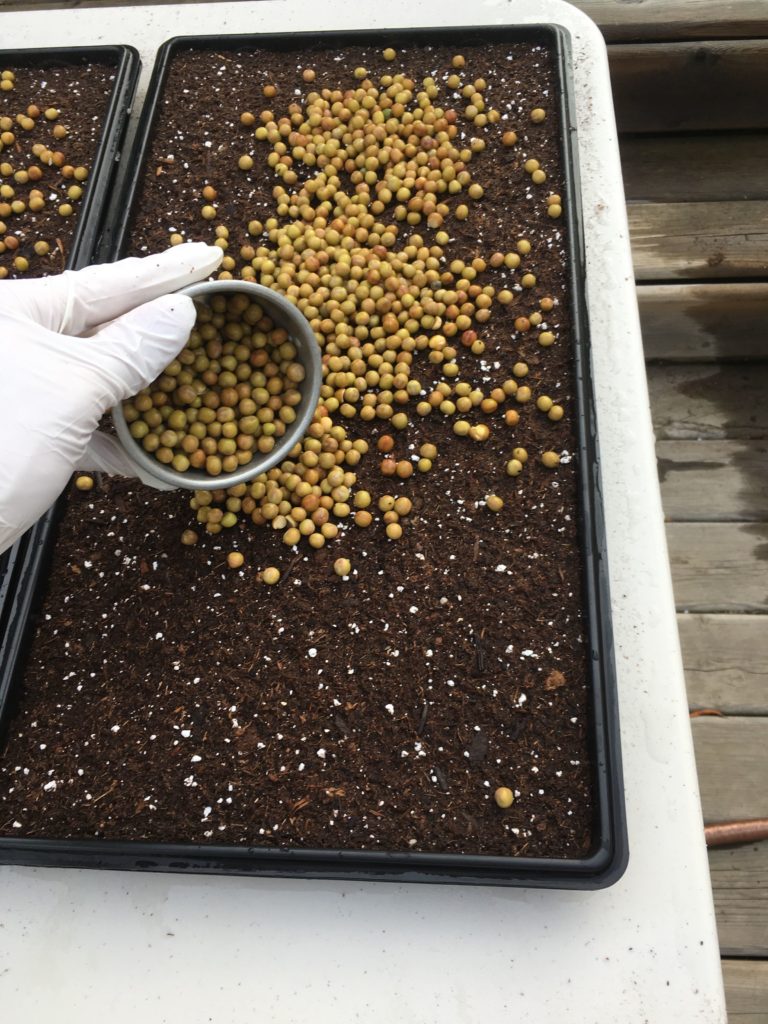
How to plant & germinate pea microgreens.
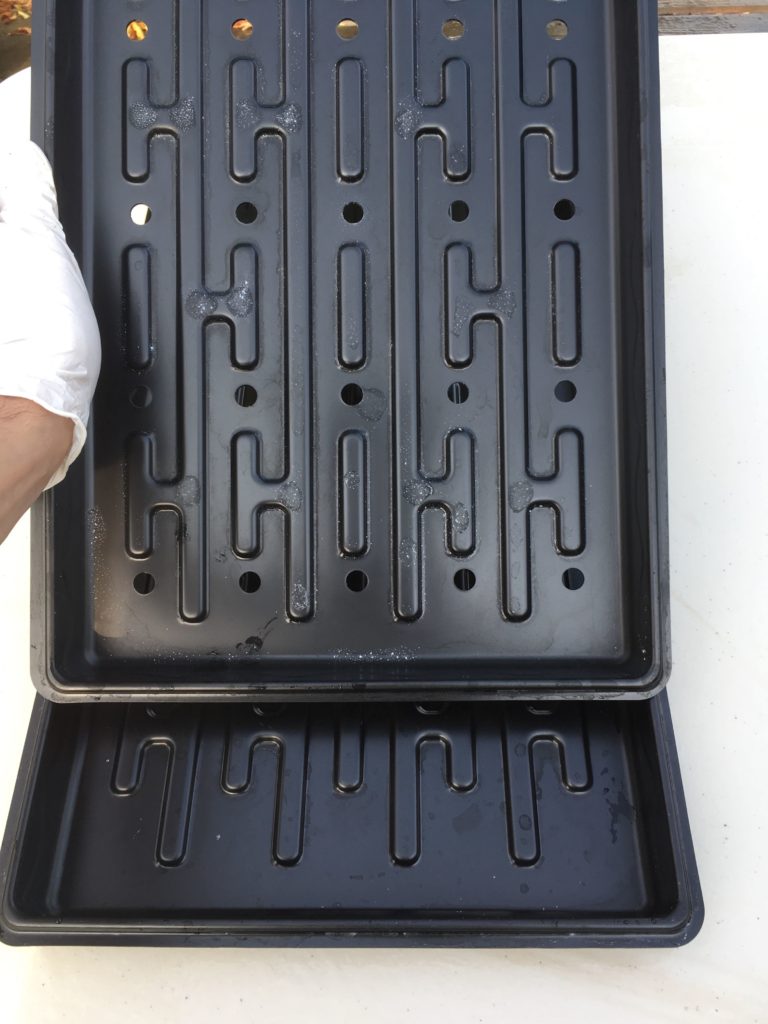
Once your seed has been sanitized and soaked for 10 to 12 hours you’re ready to plant! The first step now is we need to prep our 1020 tray with soil.
Growing indoors we prefer to insert a 1020 tray with holes inside a 1020 tray without holes. This way we have the option to top or bottom water. When we’re top watering if we over water the soil we can empty the tray below that’s collected the excess instead of having water run on the lights and plants on the shelf below.
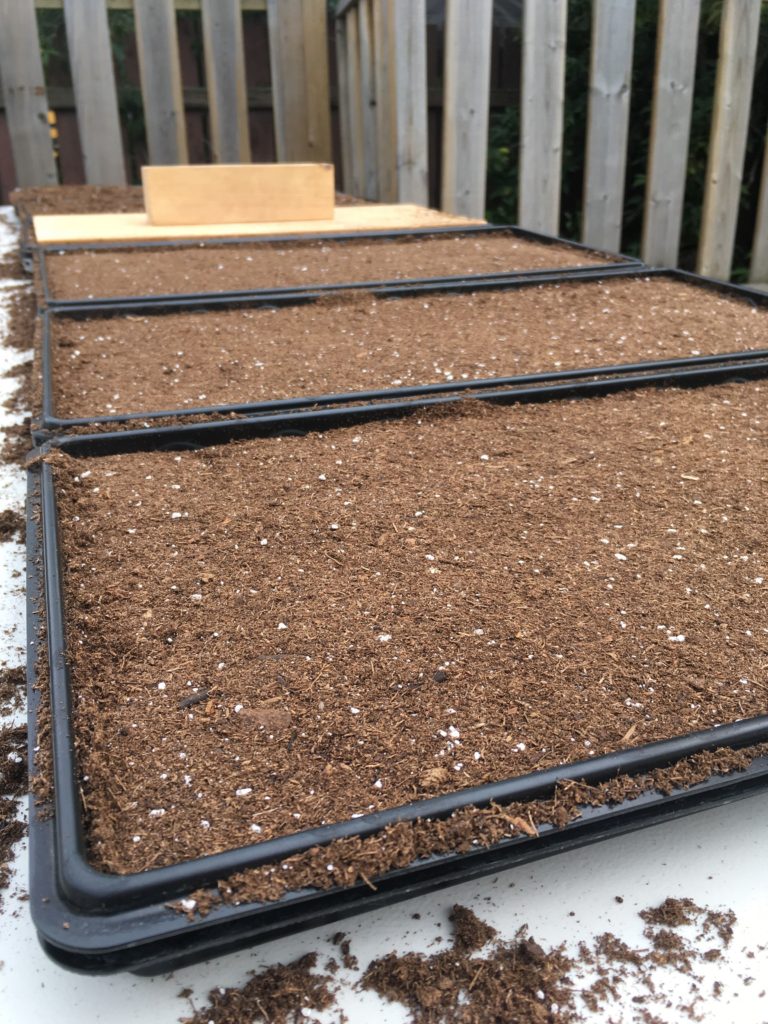
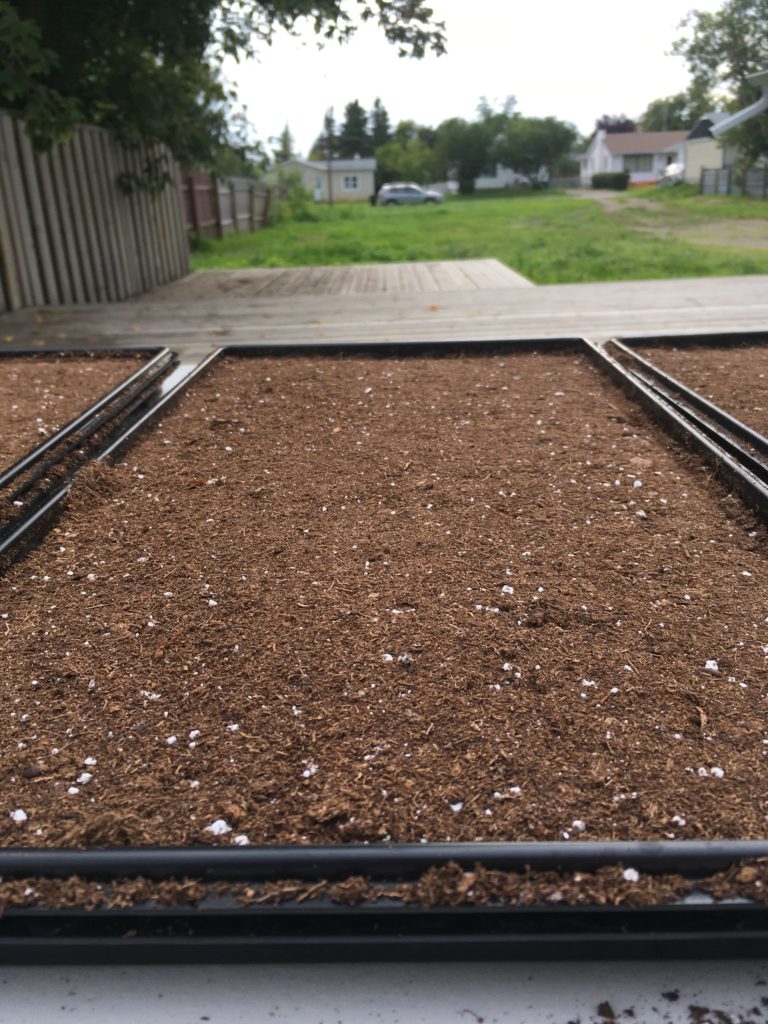
Once our trays are setup we add 3L of our sifted soil into our tray using our hands to get the soil as level as possible.
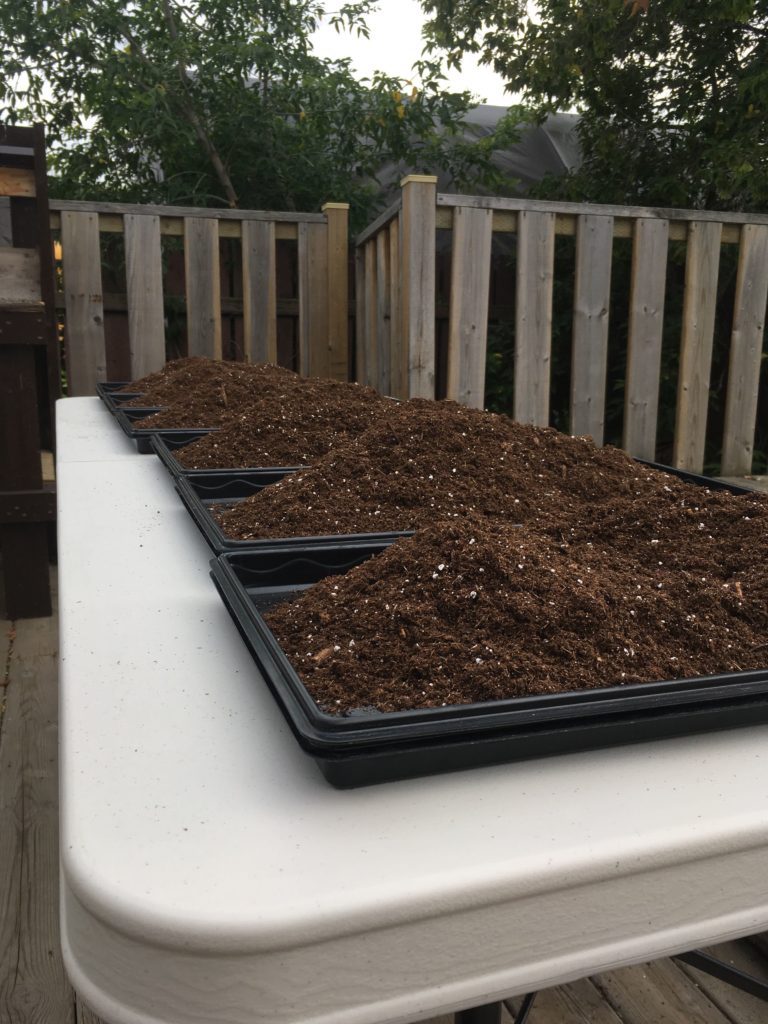

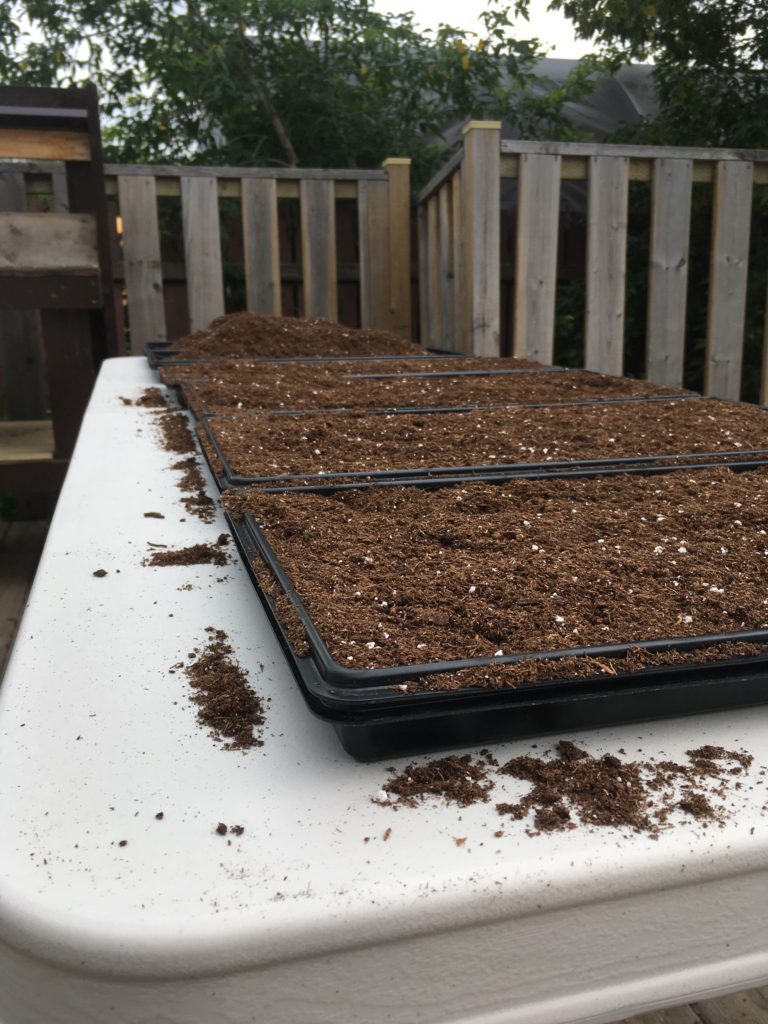
Once that’s completed we use our soil tamper and press it against the top of the soil to compress the soil bed creating a nice flat level bed to spread our soaked pea seed onto.
Per 1020 tray our seeding density for pea is between 300 to 300 grams of dry seed weight (weighed dry prior to soaking overnight).
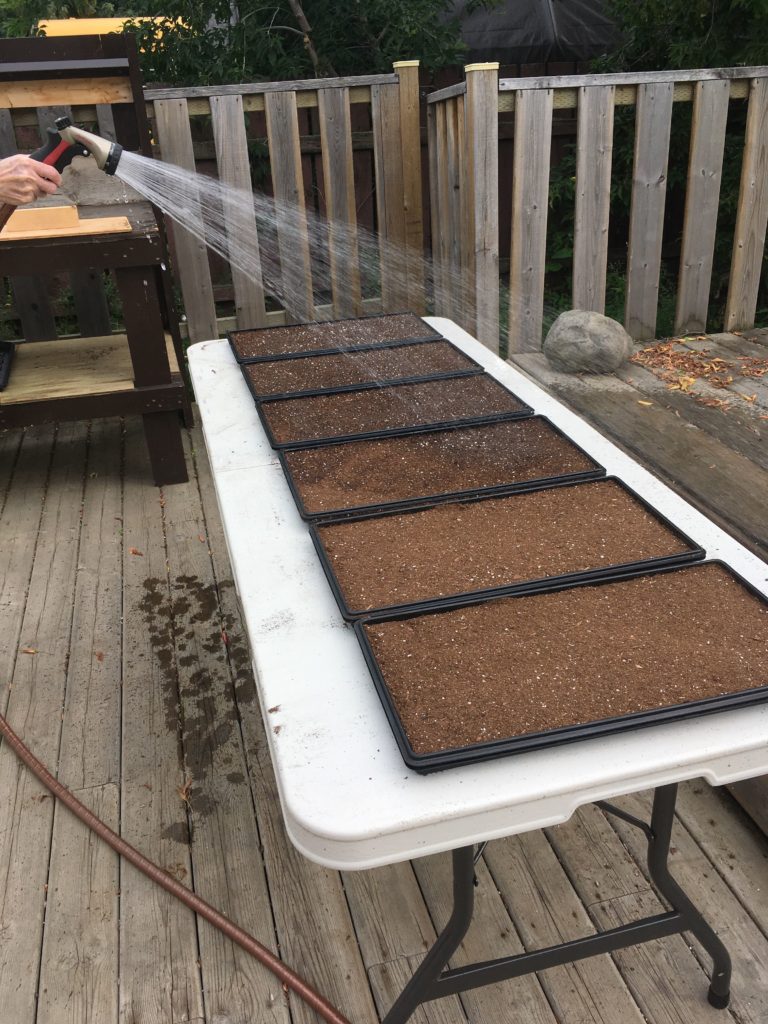
Once we have our nice level, compressed soil bed we top water the soil prior to spreading our 300 grams of seed across the surface of the tray.
Once watered we spread our seed across the soil bed, without having any pea seed stacked on top of one another.
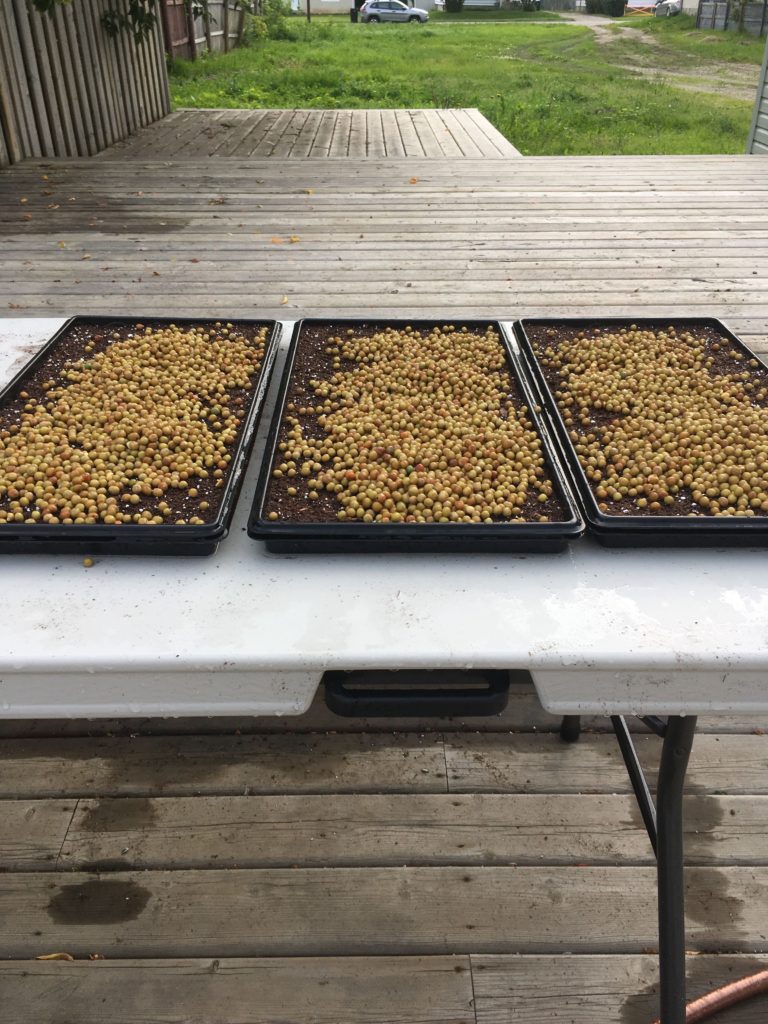
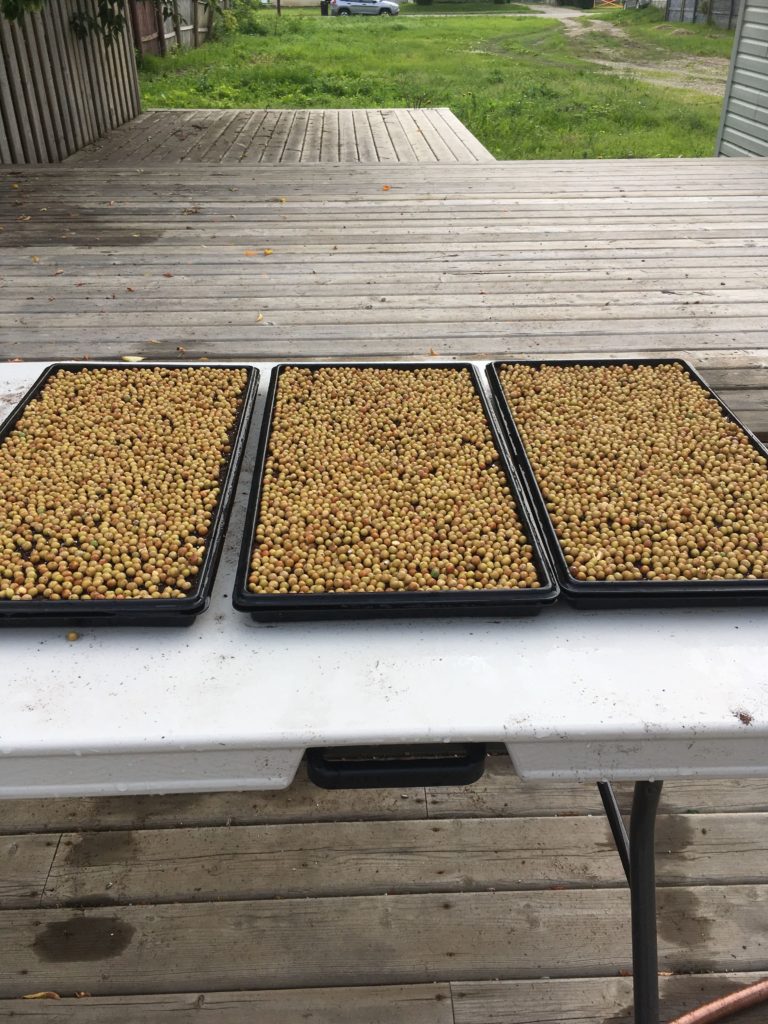
We always grow in increments of 3 trays for stacking during the germination phase. Stacking the trays 3 high with a 15lb weight on top of the third tray helps improve the strength & germination of the pea seed.
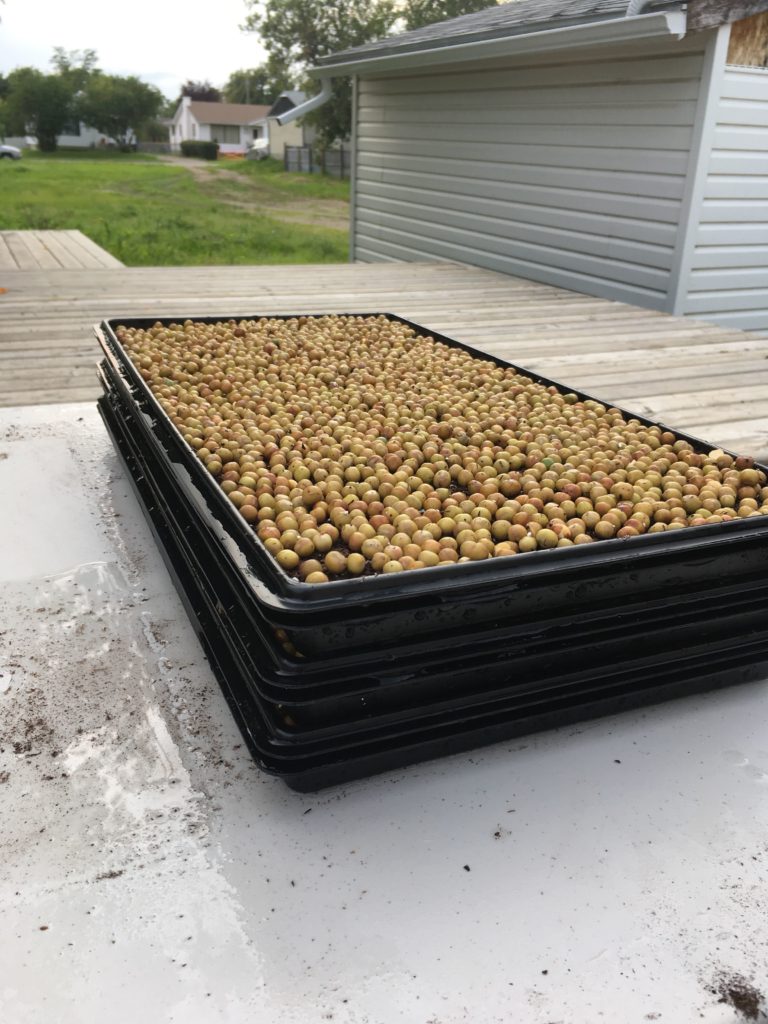
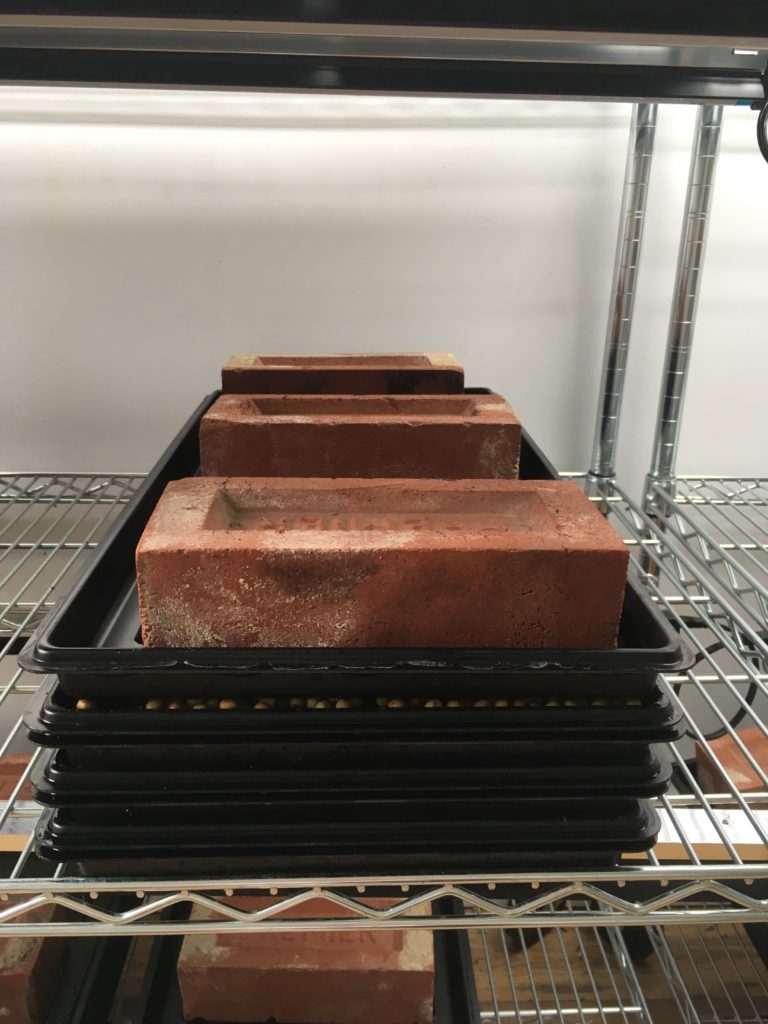
We’ll leave the trays stacked for 3 to 4 days (I had read that other microgreens growers rotate their trays from bottom to top after each consecutive day to improve germination, our germination has been fine. We personally do not rotate our trays throughout the germination cycle.)
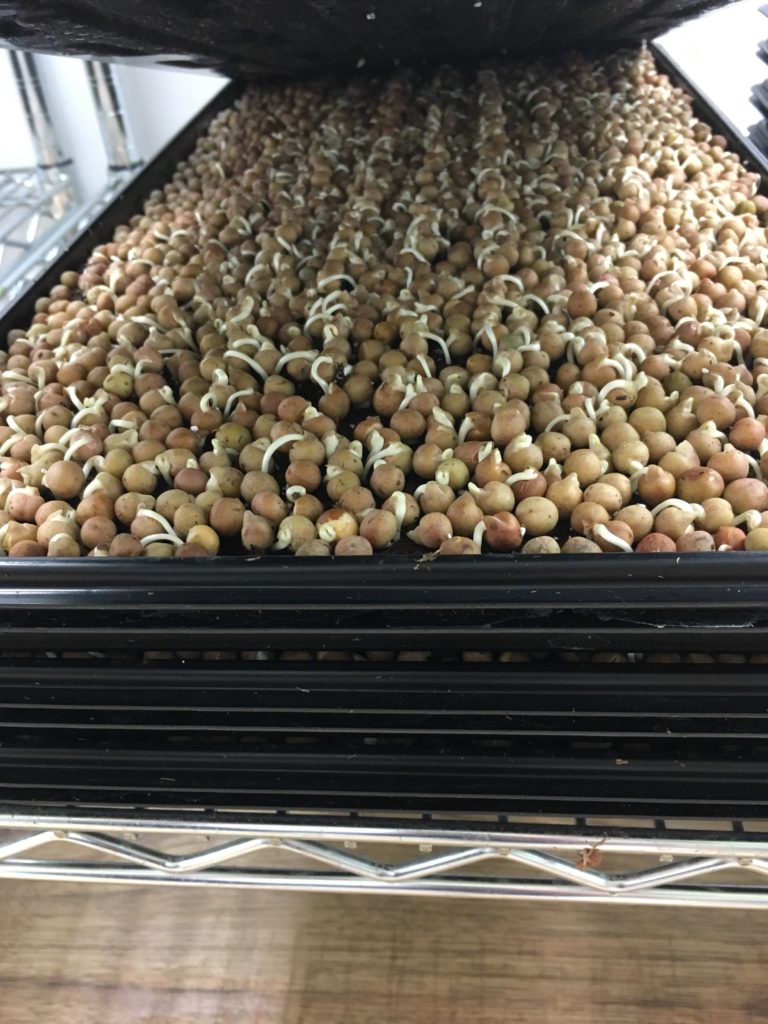
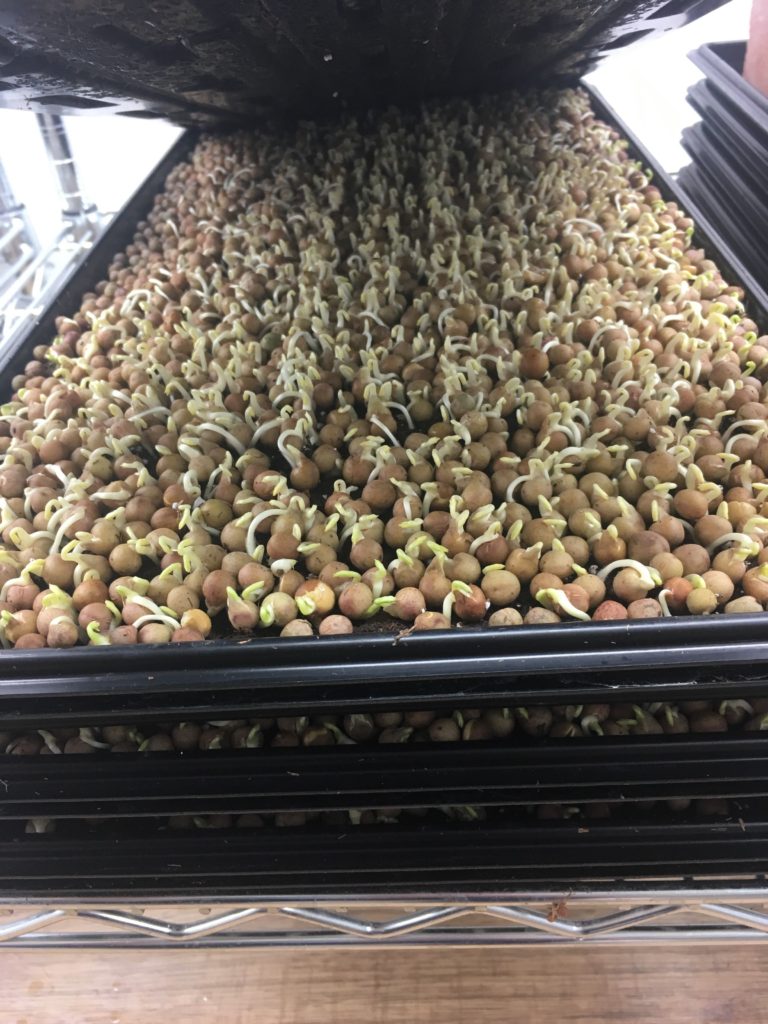
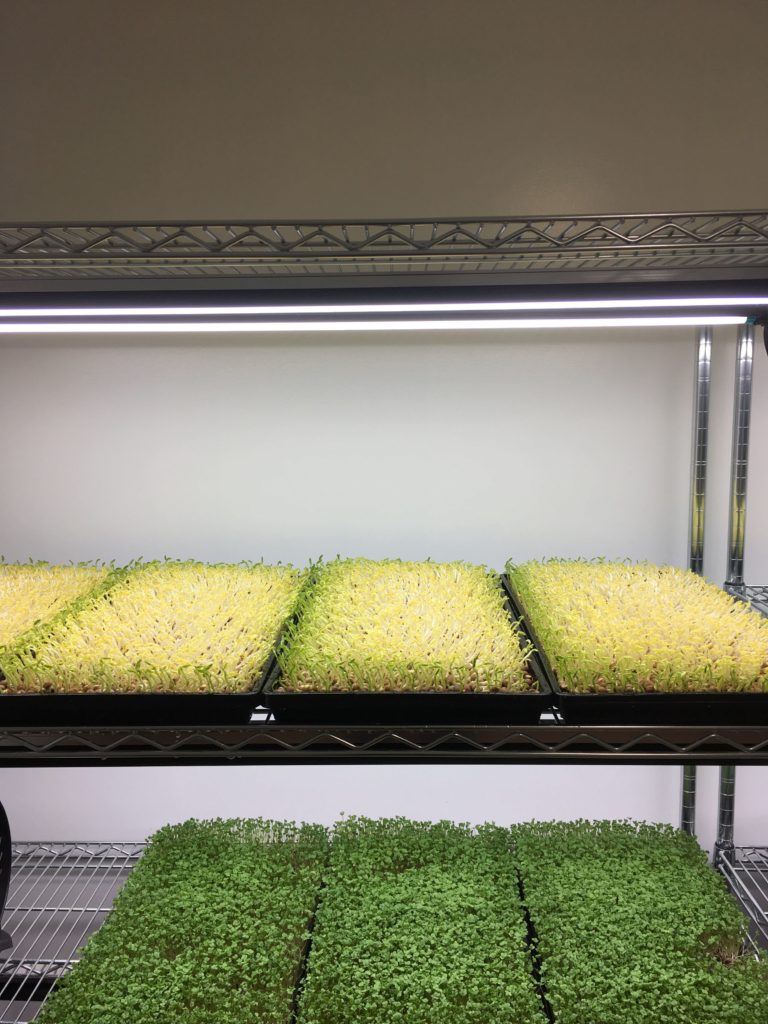
After the trays have been stacked for 3 to 4 days they’ll be ready to be unstacked, watered and placed under the grow lights.
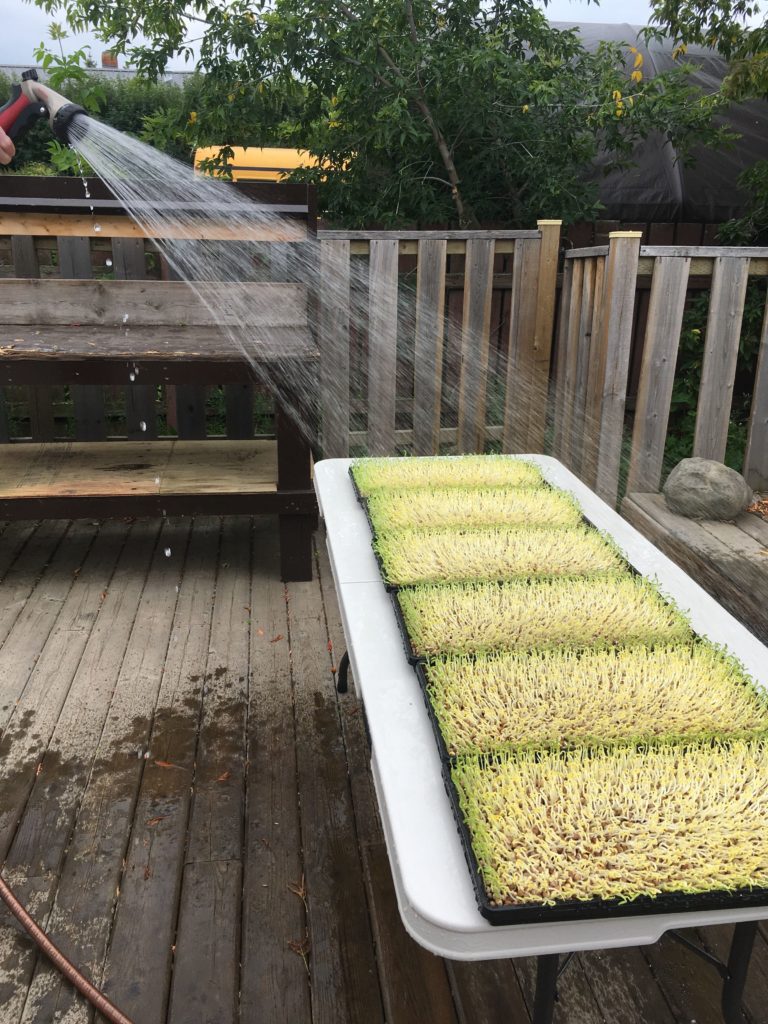

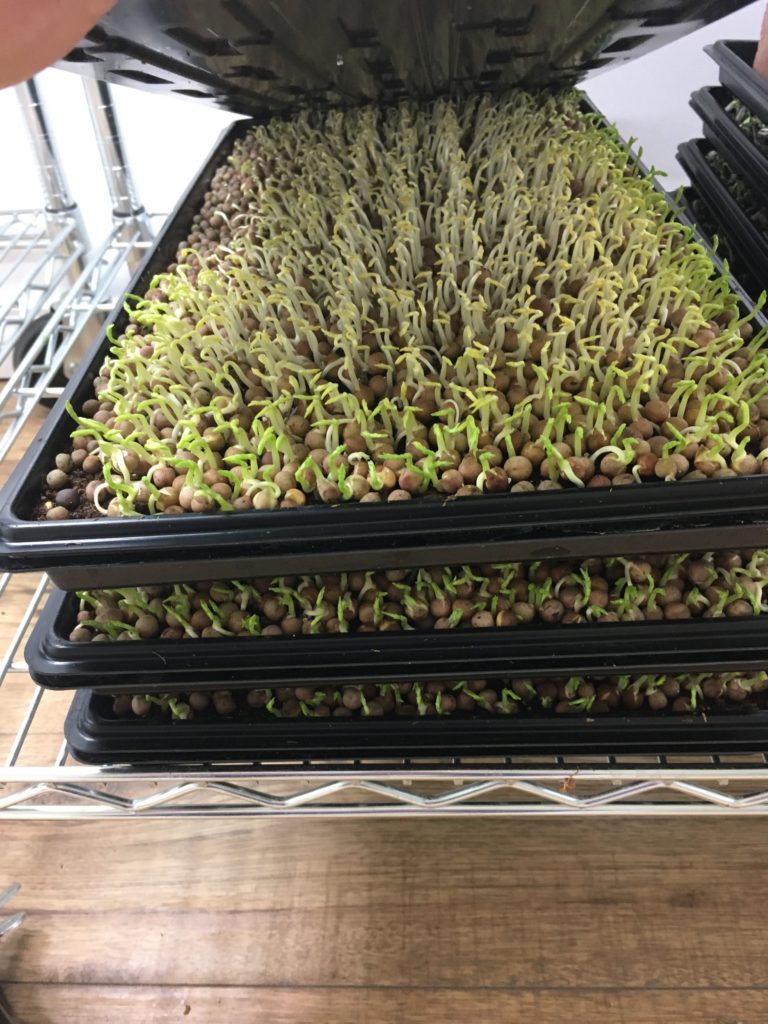
How to water & grow pea microgreens.
With pea microgreens you can either top or bottom water them, the important thing is to keep the soil moist throughout the growing process as they do not recover well from lack of water.
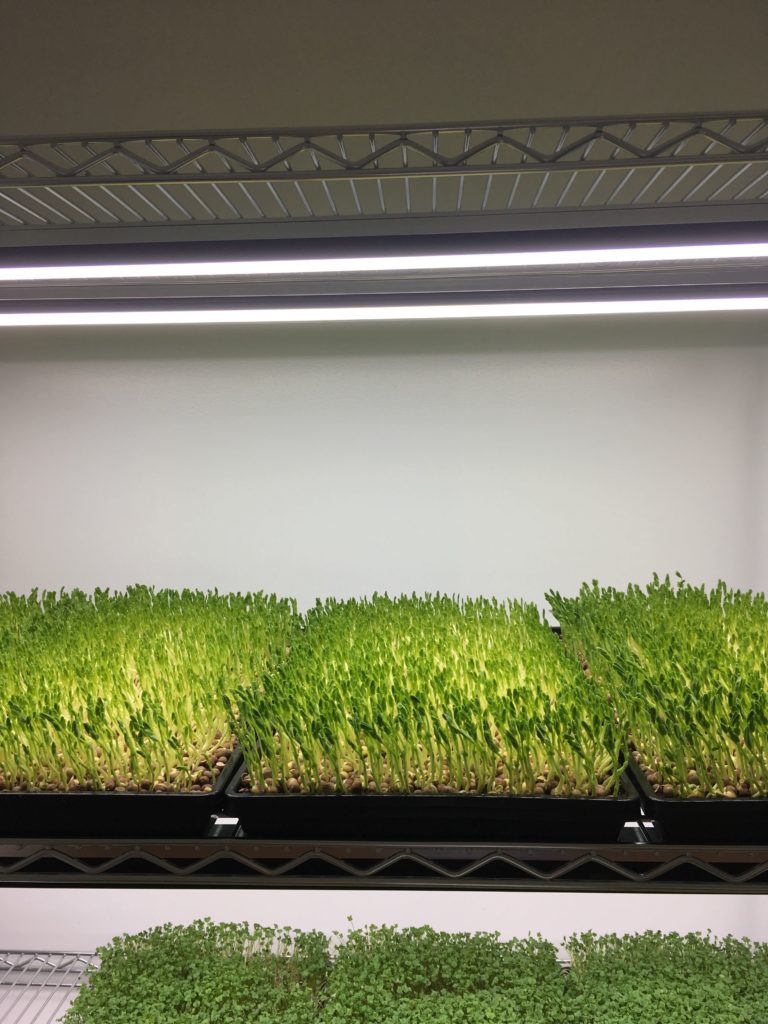
We water our peas twice a day and keep them under the grow lights for 3 to 5 days prior to harvesting.
It is three days if we’re selling them to one of our restaurant customers as they use them as a garnish on top of their hamburgers instead of lettuce.
Five days if we’re selling them to grocery stores, through our subscription service, or at the farmers market as we find the majority of our customers are using them in their salads, sandwiches, and smoothies.
It is important to have good airflow and lower humidity, we target 60% and lower, ideally having the humidity as low as possible throughout the grow room to help prevent mold & disease issues.


How & when to harvest pea microgreens
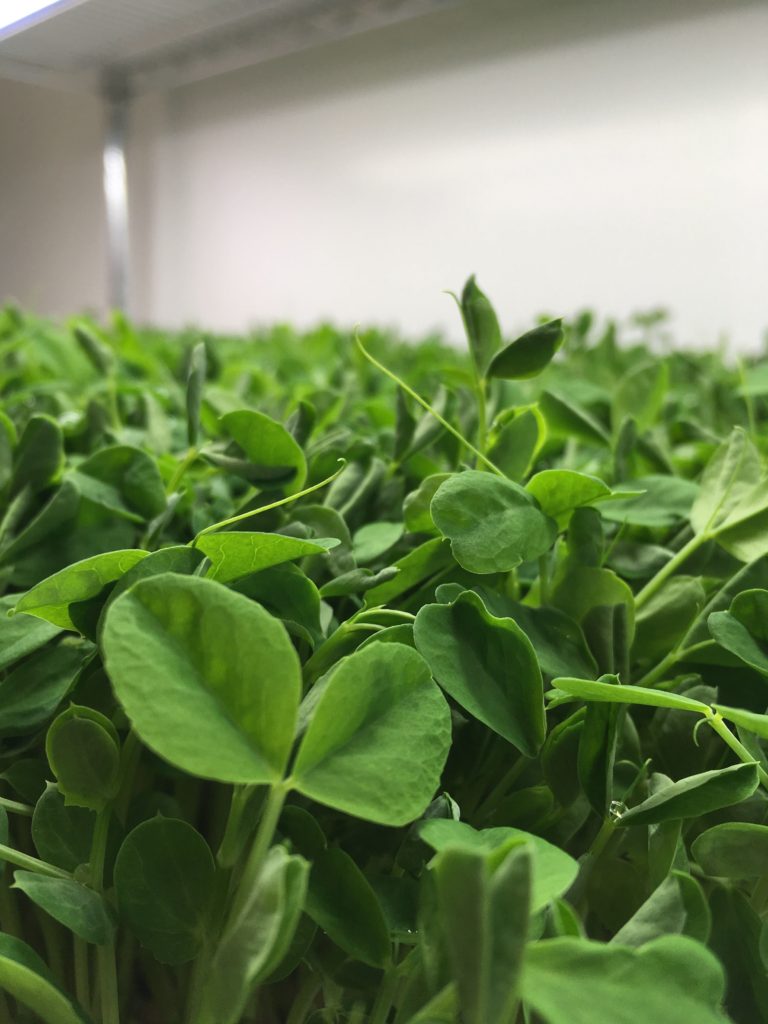
After three to five days under the grow lights, your pea microgreens should be three to four inches tall. This is when we harvest our pea microgreens.
We use a sharp kitchen knife to harvest our pea microgreens.
What do you do with the soil after harvesting your pea microgreens?
We dispose of our soil into our compost pile for eventual use into our urban farm. Some farmers we know let the peas regrow after the first cut to harvest again with a second cut.
A common question I get asked is “do you or can you reuse your soil?” I imagine you can but we do not reuse our soil as we would need to test the soil for the presence of pathogens, which for us is more expensive than simply using new soil each time and using the composted soil in our urban farm.
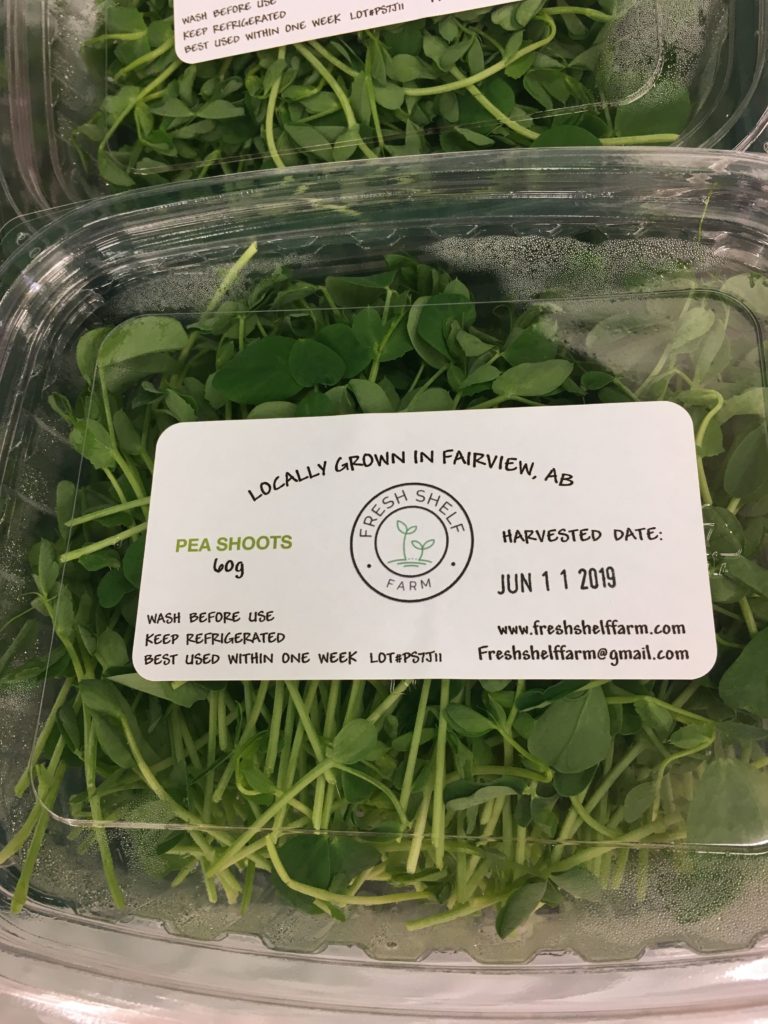
How to package your microgreens.
We package our pea microgreens into three different sized clamshells depending on the sales channel.
- 20 Grams: Free samples handed out to new customers who have never tried microgreens before.
- 60 Grams: These are by far the most common size we sell. We sell this size at the farmers market, grocery stores and the majority of our subscription members.
- 150 Grams: This size is used to fulfill our restaurant orders.
How to sell pea microgreens.
We sell our pea microgreens through a variety of sales channels.
- Subscription Service
- Farmers Markets
- Grocery Stores
- Health Food Stores
- Gyms
Pea microgreen recipes – How do you eat them?
Pea microgreens taste just like peas! They’re really fresh, juicy, and often times eaten by themselves. If they’re used in a recipe they’re most often used to create:
- Salads or added to a salad (most common)
- Stirfrys
- Sandwiches
- Juiced
- Smoothies
Pea microgreens nutritional data.
Pea microgreens are a great source of the following:
- Amino Acids
- Calcium
- Chlorophyll
- Iron
- Magnesium
- Niacin
- Phosphorus
- Potassium
- Vitamins A, B, C and E
Source: Sprouting.com
Pea microgreens health benefits.
Coming soon!
Free PDF Grow Guide for growing perfect pea shoot microgreens.
Click Here To Download Your Free PDF Grow Guide For Pea Microgreens